
The Pages Screen provides the facility to manage all the pages in ClassicPress. Pages can be edited, deleted, and viewed. You can quickly find pages matching certain criteria using the filtering and searching tools.
A powerful bulk edit feature allows pages to be edited in bulk. Fields such as Author, Comments Allowed, Status and Parent page can be be changed for a whole batch of pages. In addition, the Quick Edit feature provides an easy method to change some of the more common values, such as Title, Slug, Date and Order, for a given page.
To find pages that are not published (draft, trash, pending) handy links on top of the Table of Pages allow you to list those pages in the relevant states. A “Mine” link will help you list all pages that are authored by you (the current logged in user).
Pages ScreenLink to this section
Table of PagesLink to this section
A table lists all of your pages, in rows. The pages are listed by page title.
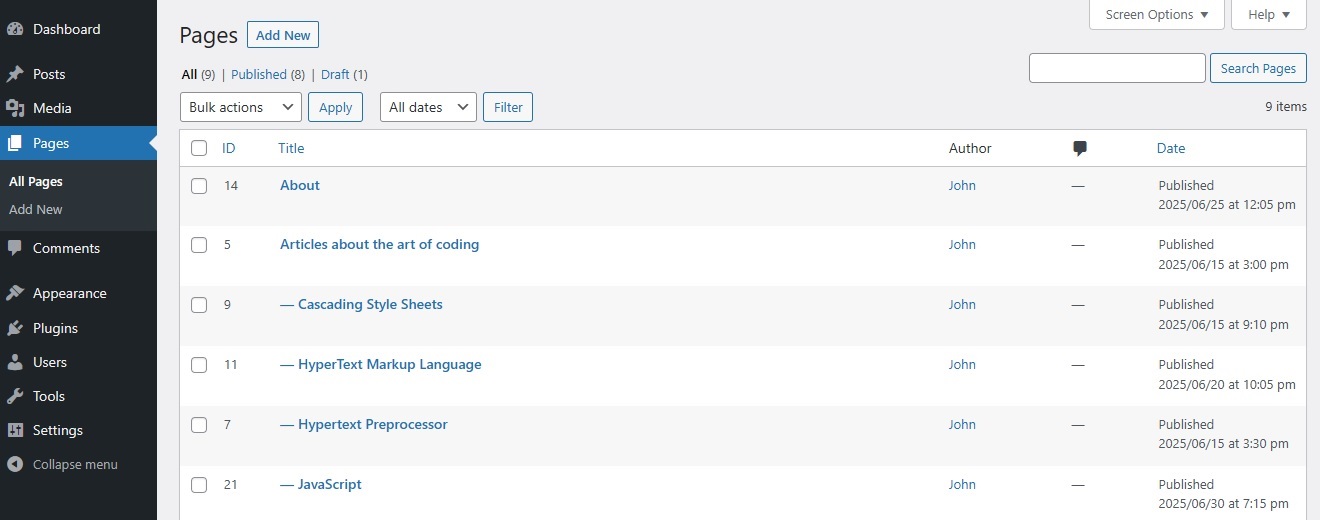
The table of pages contains the following columns:
- [ ] – This checkbox, when clicked (checked), selects that particular page to be processed by a Bulk Action.
- ID – A page’s ID number is the unique number ClassicPress’ database uses to identify individual pages.
- Title – This is the page’s title displayed as a link. Click the title link to allow this page to be edited in the Edit Page screen. Next to the title some text shows whether the page is of a Draft, Pending, or Password Protected nature.
- Author – Displayed in the form of a link, this is the author who wrote the page. Clicking the author link causes all the pages authored by that user to be displayed in the table (thus allowing a Bulk Action to be applied to all pages for a given author).
- Comment bubble – If a page has any comments, then the number of comments is displayed in a blue bubble. Clicking on a blue comment bubble causes the Comments Screen to be displayed to allow those comments to be moderated.
- Date – The date column for each page shows the date Published for published pages or the date Last Modified for other pages. If the page is a future page, then the scheduled date for publishing is displayed.
Sortable ColumnsLink to this section
Some column headings can be clicked to sort the table of pages in ascending or descending order. Hover over the column title, for example Title, to see the up-arrow or down-arrow. Click the heading to change the sort order.
Page navigationLink to this section
If more than one page of pages is available, two double-arrow boxes are provided to move to the first and last page respectively. Also two single-arrow boxes are displayed to move one page backward or forward. Finally, a box showing the current page number can be used to enter a page to directly display. The number of pages displayed per page is set under the Screen Options (see below).
Screen OptionsLink to this section
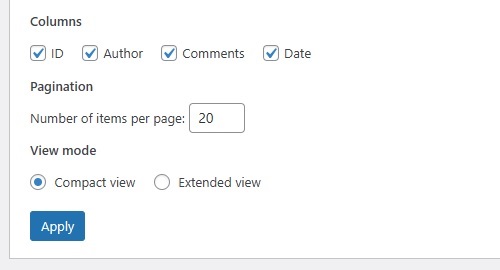
The Screen Options allow you to choose which columns are displayed, or not displayed, in the underlying table. Clicking on the Screen Options tab shows a list of the columns with a check-box next to each column. Check the box for each column you want displayed in the table, or uncheck the box to not display that column. In addition, the number of pages per page can be set.
You can also determine the amount of information listed with each page (View mode). The default view is the Compact view and only the title is listed for each page. Select the Extended view to cause several Immediate Action links to be displayed just below the title.
Click the Apply button to save your settings and close the Screen Options.
SearchLink to this section
Above the table, to the right, is a search box where you can enter a word, or series of words, and click the Search Pages button to search and display all the pages meeting your search words.
Filtering OptionsLink to this section
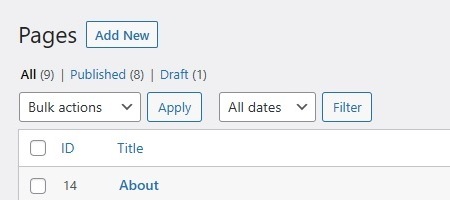
Above the table are links to All (pages), Published, Scheduled, Pending Review, Draft, Private and Trash, that when clicked, will cause just the pages of that type to be displayed in the underlying table.
Below that, and to the right of the Bulk Actions Apply button, is one other filter option:
- View dates – This select box allows you to select, by date, which pags are displayed in the table. By default, All dates is selected and all of your pages are displayed.
Clicking the Filter button applies the settings you select in the select boxes.
Using Selection, Actions, and ApplyLink to this section
SelectionLink to this section
This screen allows Bulk Actions to be performed on one or more pages selected in the table. For Bulk Actions to be performed on multiple pages at once, those pages must be first selected using the checkbox to the left of the page.
ActionsLink to this section
Actions describe the process to be performed on particular pages. There are two styles of actions that will be referred to as Bulk Actions and Immediate Actions.
- Bulk Actions
These actions can be performed on one, or more pages, at one time, if those pages have been previously selected. Bulk Actions are available as choices in the Bulk Actions select box, above the table. - Immediate Actions
Immediate Actions (also known as Quick Edits) are performed immediately, on an individual page. Hovering the mouse cursor over the page row reveals the actions under the page title column. Clicking on a page title will also initiate the Edit action.
The available Bulk Actions are:
- Edit – This action displays the Bulk Edit screen below the table of pages header. Bulk edit allows the fields Author, Parent, Template, Comments and Status to be changed for all the selected pages. Click Cancel to cancel and abort the edit of these pages.
- Move to Trash – This action will move all selected pages to the trash.
And the available Immediate Actions are:
- Edit – This action displays the Edit page screen.
- Quick Edit – This action is just an in-line edit allows you to change the following items of a page: Title, Slug, Date, Author, Password or Private, Parent, Order, template, Allow Comments and Status. Click Cancel to cancel and abort the edit of this page.
- Trash – This action will move the specific page to the trash.
- View – This action lets you view the page on the public facing site.
ApplyLink to this section
After one or more pages are selected, and after a Bulk Action is specified, the apply button performs the given action on the selected pages. Remember, prior to executing actions, one or more pages must be selected, as described before.
Adding and Editing Individual PagesLink to this section
For adding pages navigate to the Pages Add New Screen. The page editing mode is essentially the same, the only difference is that the button to save your work is called Update instead of Publish.