How to Write a Page in ClassicPressLink to this section
- Log in to your ClassicPress Dashboard.
- Click the Pages tab.
- Click the Add New sub-tab.
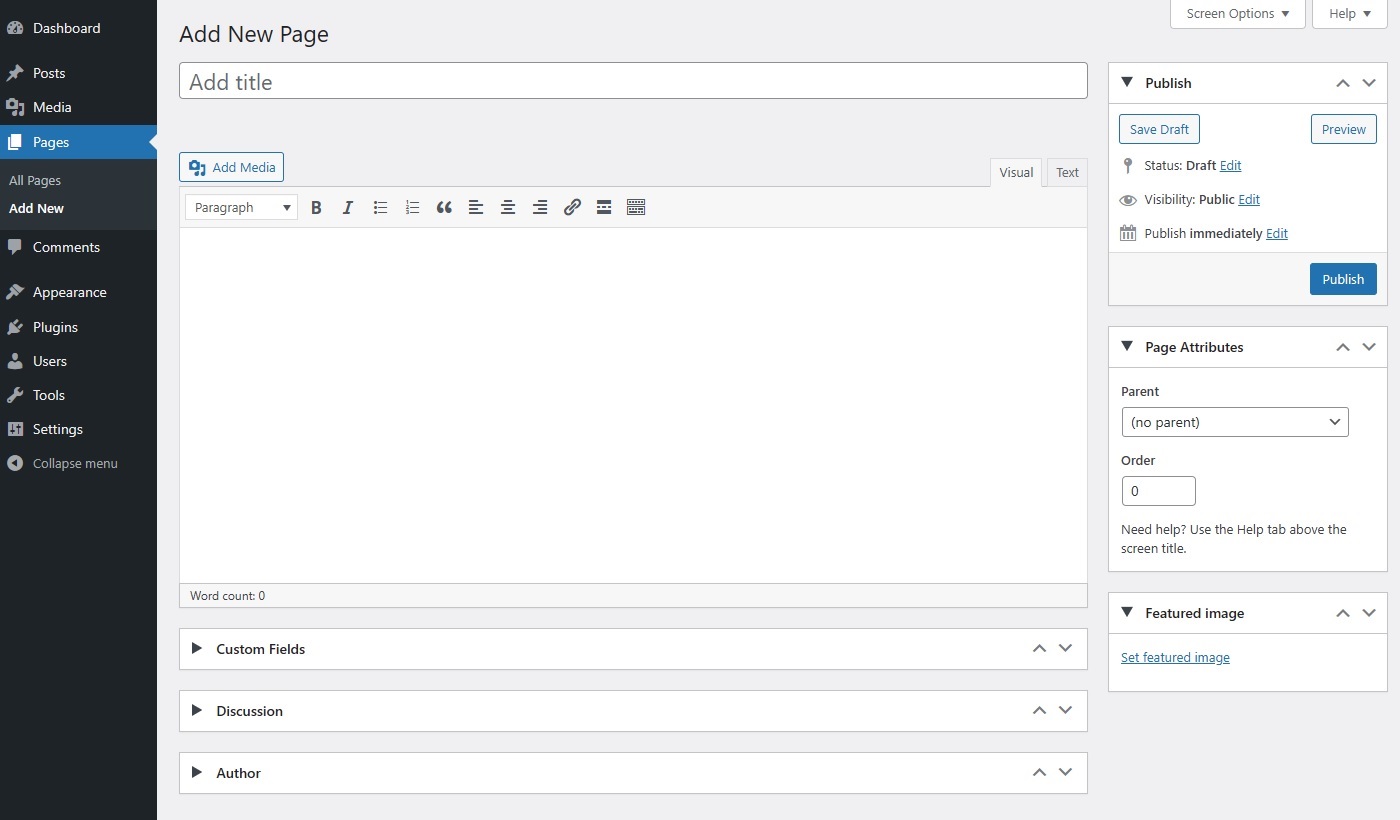
- Start filling in the blanks: enter your page title in the upper field, and enter your page body content in the main editor below it.
- As needed, select a parent page, add a featured image, and make other selections from the sections on the page screen. (Each of these sections is explained below.)
- When you are ready, click Publish.
Screen OptionsLink to this section
There are more editing fields available to you than you see on first login. The Screen Options area allows you to choose which Page Fields are displayed or hidden from your editing area, which allows you to minimize clutter and customize according to your needs.
You will find the Screen Options tab at the very top-right of your screen, and if you click on it, you will see a list of available editing boxes that you can use. Check the box for each Page Field you want displayed, or uncheck the box to hide that Field. Click the Screen Options tab again to close the tab.
Once you have customized the page writing screen, your options are saved so you that will not have to select or hide them again next time you log in.
Expanding, Collapsing, and Rearranging Field BoxesLink to this section
The Page editing field boxes, Publish, Page Attributes, Featured Image and others, can be expanded, or collapsed, by clicking on the field box title bar.
In addition, those field boxes can be moved by hovering the mouse cursor over the field title bar, when the mouse cursor changes to 4-arrows, hold the left-mouse button down, drag the box to where you want to place it, then release the mouse button.
Page Field DescriptionsLink to this section
The Page Editing Screen is used to create new pages or edit existing pages.
- Title Box – This box should contain the title of your page. You can use any phrase, words, or characters. (Avoid using the same title on more than one page.) You can use commas, apostrophes, quotes, hyphens/dashes, and other typical symbols in the title like “My New Page – Here’s What You Need to Know!”.
ClassicPress will then clean it up to generate a user-friendly and URL-valid name of the page (also called the page slug) to create the permalink for the page. - Permalink – Permalink stands for permanent link. That means a page URL that does not expose the page ID which could be subject to a change (e.g. when moving to different blogging system), but it rather contains a user-friendly page name derived from the page title which could also change, although not recommended, but in a more controllable way. This page name (also referred to as page slug or just slug) can be edited, depending on your Permalinks settings, using the Edit button. (To change your settings, go to Dashboard > Settings > Permalinks.) The permalink is automatically generated based on the title you set to the page and is shown below the title field. Punctuation such as commas, quotes, apostrophes, and invalid URL characters are removed and spaces are substituted with dashes to separate each word. If your title is “Our Site – That’s all Folks!”, it will be cleaned up to create the slug “our-site-thats-all-folks”. You can manually change this, possibly to shorten it to “our-site-thats-all”.
- Page Editor – The blank text-area where you enter your writing, links, images, links to images, and any information you want to display on your site. You can use either the visual (WYSIWYG) editor or the text view to compose your pages. For more information on the different editing experiences, see the Visual Versus Text Editor section of the Writing Posts document.
- Publish Box – Contains buttons that control the state of your page. The main states are Draft and Published. Draft means the page has not been published and remains in draft status for the page creator. A Published status means the page has been published and is live on your site.
- Preview Button – Allows you to view the page before publishing.
- Save Draft – Allows you to save your page as a draft rather than immediately publishing it.
- Status – Allows you to save the page with a certain status. (Click Edit next to “Status: Draft”.) For example, to save a page in the Pending Review status, select Pending Review from the Status drop-down box, click Ok, then click Save As Pending. (You will see all pages organized by status by going to Pages.)
- Visibility – This determines how your page appears to the world. (Click Edit next to Visibility.) Public pages will be visible by all website visitors once published. Password Protected pages are published to all, but visitors must know the password to view the page content. Private pages are visible only to you (and to other editors or admins within your site).
- Revisions – Click Browse to see all of the changes you’ve made to your page.
- Scheduling – To schedule a page for publication on a future time or date, click Edit next to the words Publish immediately You can also change the publish date to a date in the past to back-date pages. Change the settings to the desired time and date. You must also click the Publish button when you have completed the page to publish at the desired time and date.
- Page Attributes
- Parent – You can arrange your pages in hierarchies. For example, you could have an About page that has “Life Story” and “My Car” pages under it. There are no limits to how many levels you can nest pages.
- Template – Some themes have custom templates you can use for certain pages that might have additional features or custom layouts. If so, you’ll see them in this dropdown menu.
- Order – Pages are usually ordered alphabetically, but you can choose your own order by entering a number (starting from 0 upwards) in this field.
- Featured Image Box – Some themes use a Featured Image alongside the content. This could be a page thumbnail, or a header, or whatever the theme designer has decided to implement.
- Custom Fields – Custom Fields offer a way to add information to your site. In conjunction with extra code in your template files or plugins, Custom Fields can modify the way a page is displayed. These are primarily used by plugins, but you can manually edit that information in this section.
- Discussion – Options to enable interactivity and notification of your pages. This section hosts two check boxes: Allow Comments and Allow trackbacks and pingbacks. If Allow Comments is unchecked, no one can post comments to this particular page. If Allow trackbacks and pingbacks is unchecked, no one can post pingbacks or trackbacks to this particular page.
- Page Author – A list of all blog authors you can select from to attribute as the page author. This section only shows if you have multiple users with authoring rights in your blog. To view your list of users, see Dashboard > Users.
Page RevisionsLink to this section
By default, ClassicPress maintains a list of revisions for each page. Every time a page is saved, a new revision is created and stored in the database. To be on the safe side, ClassicPress also makes autosaves of every page while it is being edited, and the latest of these is also stored in the database as a revision. This is a very useful feature, as it means it’s possible to revert to a previous revision at any time. Read More on Revisions.