
ClassicPress is developed on GitHub. This also means you’re required to use GitHub if you want your plugin or theme to be listed in the ClassicPress Directory.
For installing a plugin or theme from the ClassicPress Directory, you need the ClassicPress Directory Integration plugin. This plugin also takes care of updates for plugins and themes that are listed there.
If you are not an experienced GitHub user, or you don’t know how to submit a plugin or theme to the ClassicPress Directory, this doc will get you started. For this doc we are using the website version of GitHub.
Things you read here may sound familiar, if you already read other ClassicPress documentation. This doc simply combines all the available info into a “get you started” doc.
Plugin and Theme requirementsLink to this section
You cannot present your (WordPress) plugin or theme to ClassicPress, without including certain ClassicPress specific elements.
HeadersLink to this section
ClassicPress plugins and themes require specific headers in the main plugin file or theme file style.css. Otherwise ClassicPress and the ClassicPress Directory Integration plugin do not recognize it and are not able to provide updates you are releasing via GitHub.
See the Plugin Directory Requirements and Theme Directory Requirements for the (required) headers to include.
ReadmeLink to this section
Besides specific headers, the readme file requires a certain markup as well. And ClassicPress strongly prefers a README.md over a readme.txt file.
See the Plugin Readme Requirements and Theme Readme Requirements for the markup to use.
GitHubLink to this section
As mentioned before, ClassicPress is developed on GitHub. This also means you’re required to use GitHub if you want your plugin or theme to be listed in the ClassicPress Directory.
Create plugin or theme repositoryLink to this section
Login or create an account on GitHub.
When logged in, navigate to your profile page: https://github.com/your-user-name.
Via tab “Repositories” navigate to the repositories page, where you can create a repository for your plugin or theme.
Click on the green “New” button to set up a new repository and page below opens.
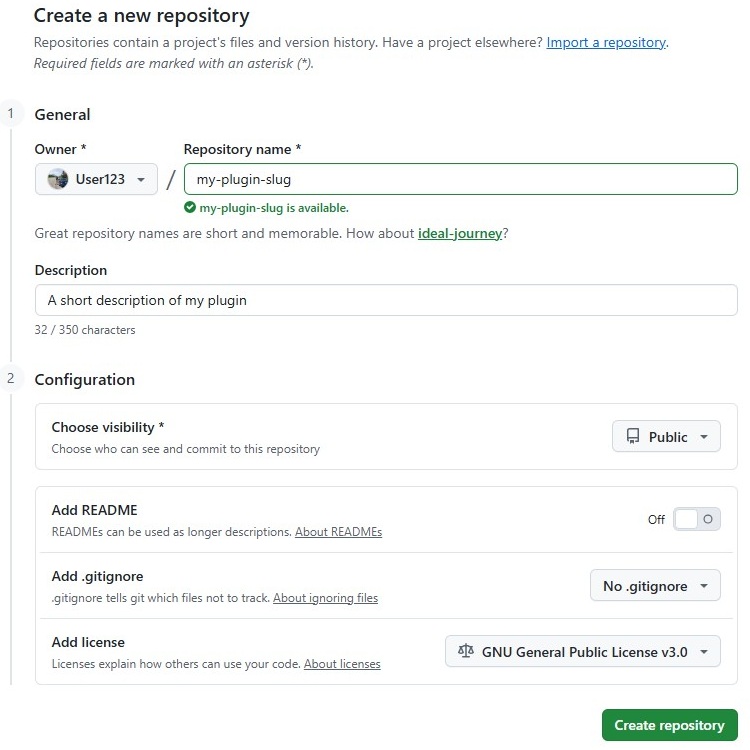
The repository name should be the slug of your main plugin or theme folder. You can add a licence (for example GPL v3), that will be included in the repository.
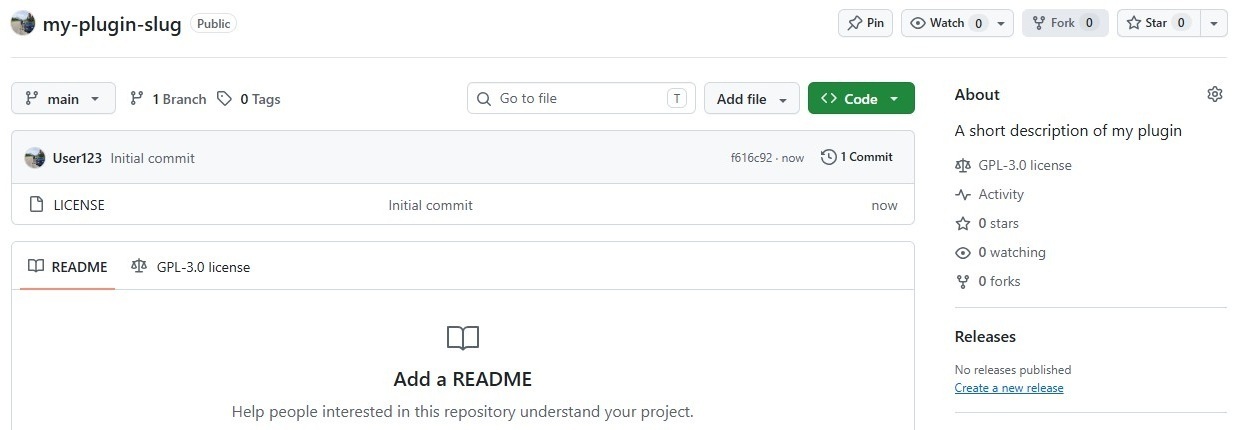
When clicking the green “Create repository” button, the new (almost) empty repository page of your plugin or theme will open. The licence is added too.
Next you should set the proper Action permissions in your repository on the Settings > Actions > General page. The “Workflow permissions” should be set on “Read and write permissions”.
CommitsLink to this section
You push changes to your repository by doing commits.
Before each commit a popup opens, in which you can add some info about the specific commit. It’s not required to change the default info, but in some cases it’s useful to explain the changes you’ve made.
If the (recommended) workflow file cpcs.yml is included in your repository (see section below), the code of each commit will be checked against the ClassicPress Coding Standard.
Workflow filesLink to this section
The following instructions are not required, but recommended. This can also speed up the review of your plugin or theme.
Navigate to your main repository page. It’s time to add some ClassicPress specific files.
- cpcs.yml – file that is used to check your code against the ClassicPress Coding Standard, upon committing it to your repository.
- add-zip-to-release.yml – file that is used to create a properly crafted ZIP file, for your plugin or theme release.
Download both files from this repository to your device.
Open file cpcs.yml and edit line 21 to reflect your text domain (often the same as the slug of your main plugin or theme folder).
sed -i '/MY_DOMAIN/ s//my-plugin-slug/' phpcs.xmlBoth files should be placed in a folder called .github/workflows.
Unfortunately it’s not possible to add folders manually in the website version of GitHub. Adding files, on the other hand, is easy.
Go to your repository and click Add file > Create new file. Page below opens.
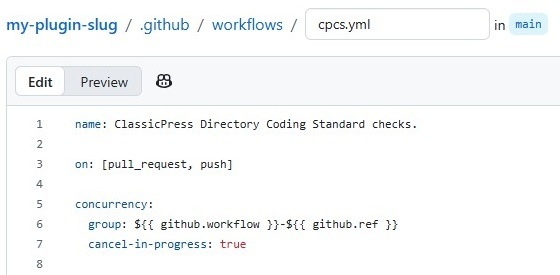
Enter file path + file name .github/workflows/cpcs.yml and paste the code from your (edited) cpcs.yml file.
Click the green “Commit changes” button to add the folder and file to your repository.
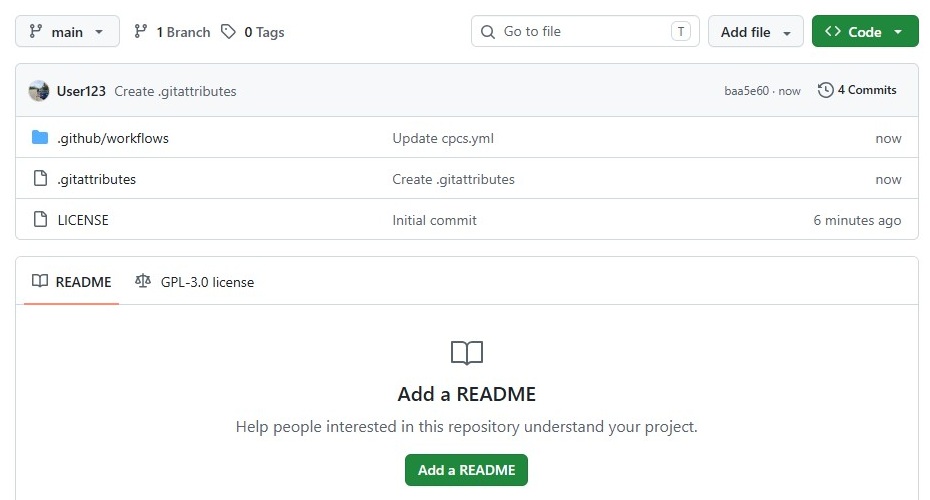
Navigate to your main repository page and you will see a new folder is added, that holds the cpcs.yml file.
We should not forget to add the file add-zip-to-release.yml to the same folder.
Open the /workflows folder and click Add file > Upload files to add this file as well.
The last recommended file to add is called .gitattributes and is used to exclude specific folders and files from your release (such as folder .github/workflows and file .gitattributes itself).
On your main repository page, click Add file > Create new file and name it .gitattributes. Add the code below to the file and do a new commit.
.github/ export-ignore
.gitattributes export-ignore
After all workflow files are added, your repository looks like this:
Commit plugin or theme filesLink to this section
Now all workflow files are added, it’s time to upload your plugin or theme.
On your main repository page click Add file > Upload files. Page below opens.
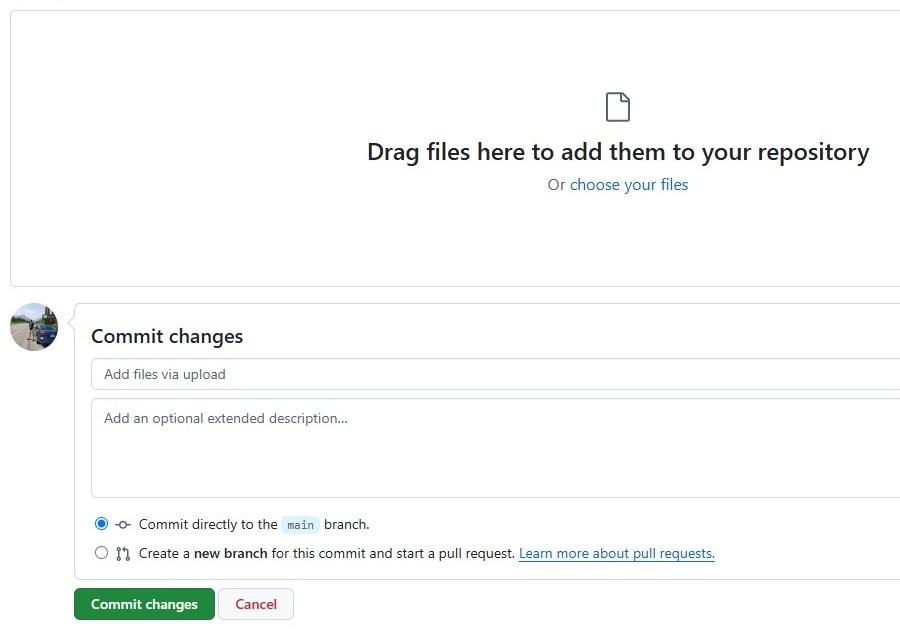
Fortunately GitHub allows you to drag and drop your entire plugin or theme at once (including sub folders, such as /css, /js, etc).
Select all plugin or theme sub folders and files and drag them into to modal.
Click the green “Commit changes” button.
Now all sub folders and files will be uploaded to your repository.
If you forgot a file, you can easily upload the missing one afterwards.
After uploading your plugin or theme, your repository looks like this:
(the content of your README.md file will be displayed as well)
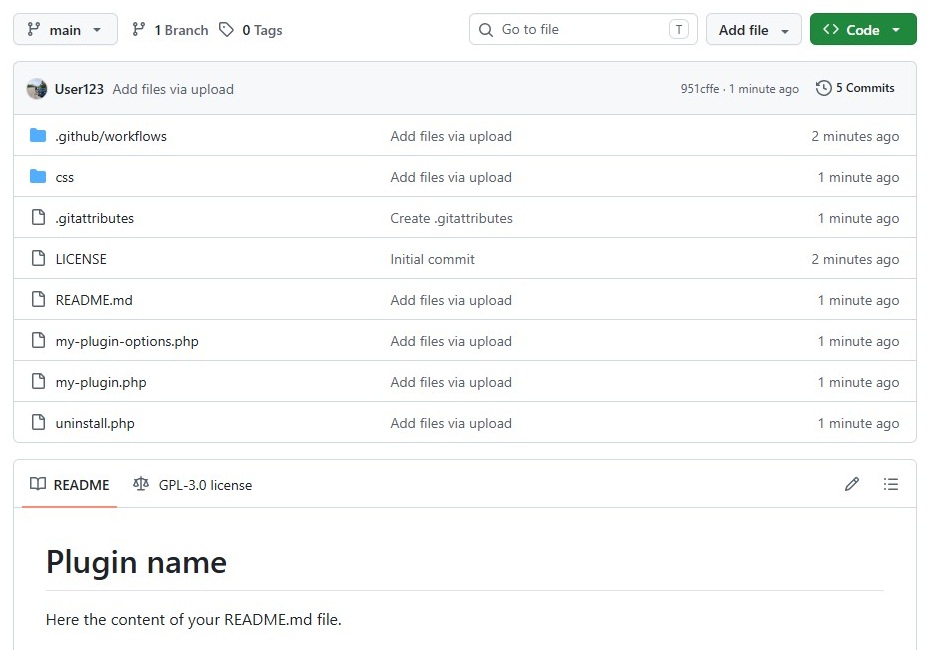
If you made a mistake in a folder name, you can change this by editing the file path of each file in that folder.
Open a file in the editor, put your cursor before the file name and press the backspace button, which makes whole file path editable. Change file path and do a new commit. Repeat this for each file in the folder.
In case a folder contains many files, best thing to do is to delete the entire folder and start over. To delete a folder, open the folder, click the 3 (more options) dots on the right > Delete directory.
If you made a mistake in the name or code of a file, you can edit the file and do a new commit.
Check with CPCS (ClassicPress Directory Coding Standard)Link to this section
As mentioned before, all plugins and themes must meet the ClassicPress Coding Standard. If the (recommended) workflow file cpcs.yml is included in your repository, all commits will be checked against this standard.
If a commit does not meet the standard, you will be informed via e-mail.
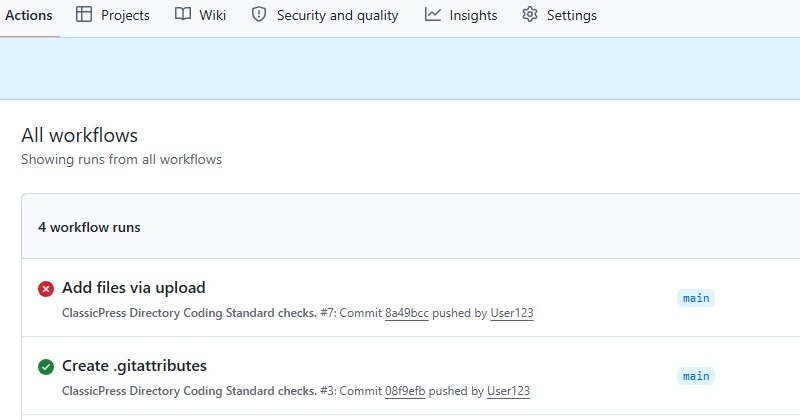
All approved and rejected so called “workflow runs” are listed at page “Actions”.
Clicking a rejected workflow will give you the info about the warning or error, so you are able to fix the specific file and do a new commit.
If multiple files (in the same folder) should be fixed, you could also do this locally and commit all files at once.
Plugin or theme releaseLink to this section
In order to list your plugin or theme in the ClassicPress Directory you should create a “release”. A release is a way to package, document, and distribute a finalized version of your plugin or theme to users.
The ClassicPress Directory requires a properly crafted ZIP file. This means an extra ZIP file (that contains your plugin or theme) should be added to the release. The (recommended) workflow file add-zip-to-release.yml does that for us.
On your repository page click “Releases” in the sidebar on the right. The Release page opens.
Click the green “Create a new release” button.
(If your create a subsequent release (when updating the plugin or theme), click the “Draft a new release” button instead.)
In the “Select tag” dropdown click “Create new tag”. The tag should be the version number of your plugin or theme. For the initial release this is “v1.0.0”.
(For subsequent releases please respect Semantic Versioning.)
Enter a title and a description for your release.
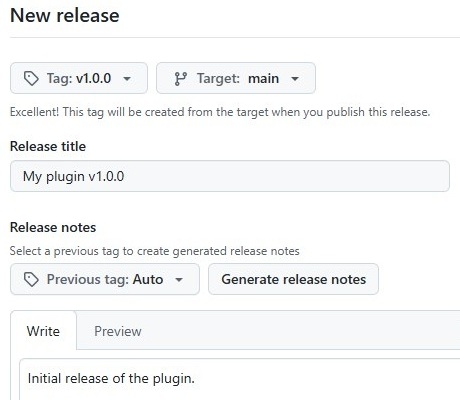
Click on the green “Publish release” button.
If the (recommended) workflow file add-zip-to-release.yml is included in your repository, leave the workflow time to run. You’ll get the ZIP file attached to the release. This it the file the ClassicPress Directory will use.
A completed release will look like this:
(You may have to refresh the page to see the attached ZIP file appear.)
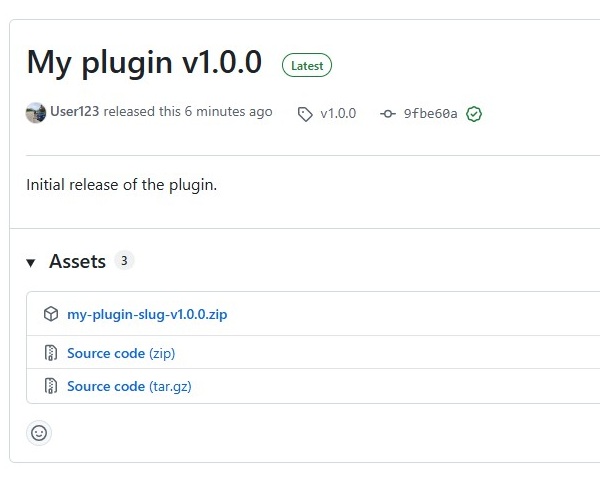
If you choose not to include the (recommended) workflow file add-zip-to-release.yml in your repository, you need to manually add the ZIP file to your release.
You must ensure your ZIP file expands into the correct directory, which doesn’t contain the version numbers.
ZIP your plugin or theme folder (from “my-plugin-slug” to “my-plugin-slug.zip”).
You could edit the name of the zipped folder and include the version numbers (“my-plugin-slug-v1.0.0.zip”).
While creating a release, add the ZIP file.
ClassicPress DirectoryLink to this section
To have your plugin or theme listed in the ClassicPress Directory, you must first register, for which you will need to provide a GitHub username. You will then need to activate Two Factor Authentication, after which we will review your registration. You will receive an email when it has been approved.
Submit your plugin or themeLink to this section
You may then use the Software Submission Form to submit your plugin or theme to the Directory. You will need to ensure that the code for your plugin is stored in a GitHub repository associated with the GitHub username you previously supplied when you registered.
In the “Software Download Link” input you should paste the link of the previously created ZIP file attached to the release.
The review theme will then do a full review of your plugin or theme.
When issues are found, the team will contact you via e-mail.
You should make the necessary changes and release a new (updated) version (v1.0.1) via GitHub.
Inform the review team about your new release via the “Code Review Response Form” in your Directory account.
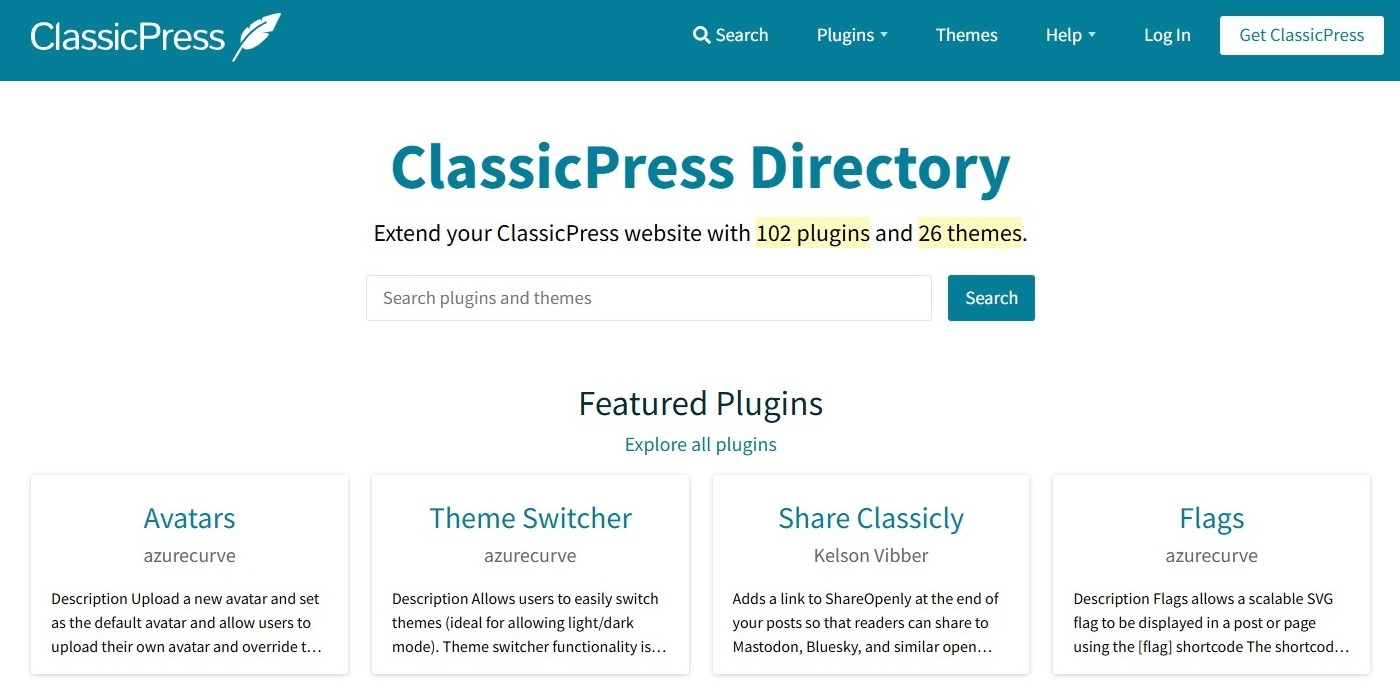
When the plugin or theme is approved, it will be listed in the ClassicPress Directory. Congrats!
Plugin or theme updateLink to this section
If you want to update your plugin or theme, make your changes on GitHub, and release a new version.
You may then go to your plugin or theme page in your Directory account and press the “Update Download Link” to update the listing in the ClassicPress Directory. If not doing so, then it will be automatically updated the same day.
In dept documentationLink to this section
For in dept information you could read the docs below.