
The Users Screen allows you to add, change, or delete your site’s users. In addition, you can search for users and make bulk changes and deletions to a selected group of users.
Users screenLink to this section
Table of usersLink to this section
The main part of the Users screen displays a table of all the users listed by Username order.
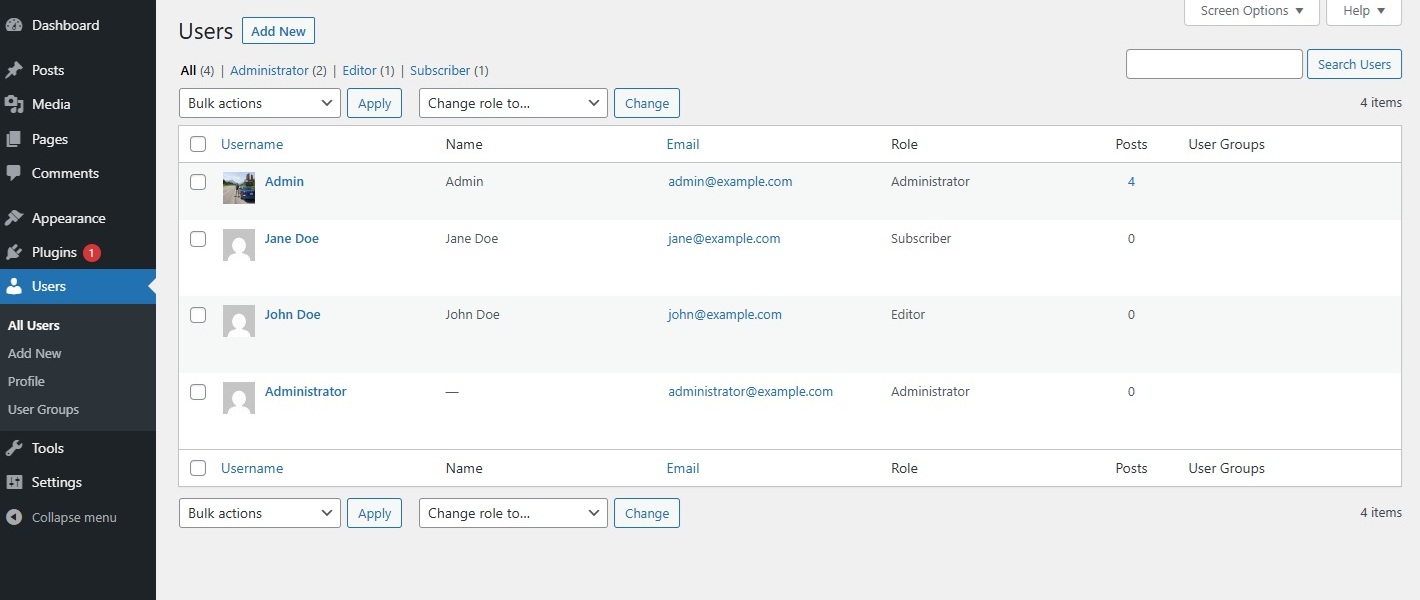
The table of users contains the following columns:
- [ ] check box – This checkbox, when clicked (checked), selects that particular user to be processed by a Bulk Action.
- User Image – Avatar for this particular user.
- Username – The login of the user. To edit a user, click on the Username link, the Profile screen will then display for you to make the necessary changes. Also note that if you hover the mouse anywhere over the whole row for a particular user, the Edit, Delete, View and Send password reset links will be made visible for use.
- Name – The first and last names of the user.
- Email – The user’s email address.
- Role – The role assigned to that user. A user’s role determines their capabilities in ClassicPress.
- Posts – The number of posts written by that user. Click on that number to be directed to the Posts screen to view or edit the posts written by this user.
- User Groups – User groups the user is assigned to. This feature lets you organize groups of users, similar to how media files can be grouped into categories. User groups can be managed via Users > User Groups.
Sortable columnsLink to this section
Some column headings can be clicked to sort the table of users in ascending or descending order. Hover over the column title, for example Username, to see the up-arrow or down-arrow. Click the heading to change the sort order.
Page navigationLink to this section
If more than one page of users is available, two double-arrow boxes are provided to move to the first and last page respectively. Also two single-arrow boxes are displayed to move one page backward or forward. Finally, a box showing the current page number can be used to enter a page to directly display. The number of users displayed per page is set under the Screen Options (see below).
Screen optionsLink to this section
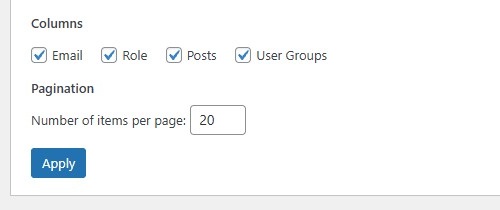
The Screen Options allow you to choose which columns are displayed, or not displayed, in the underlying table. Clicking on the Screen Options tab shows a list of the columns with a check-box next to each column. Check the box for each column you want displayed in the table, or uncheck the box to not display that column. In addition, the number of users per page can be set.
Click the Apply button to save your settings and close the Screen Options.
SearchLink to this section
Above the table, to the right, is a search box where you can enter a word, or series of words, and click the Search Users button to search and display all the users meeting your search words. Any user that contains the search string in the Username, Name, Email, or Website fields will be displayed, by role. You can then add, change, and delete those users. A “No users found” message will be displayed if no users can be found that match the search string you entered.
Filtering optionsLink to this section
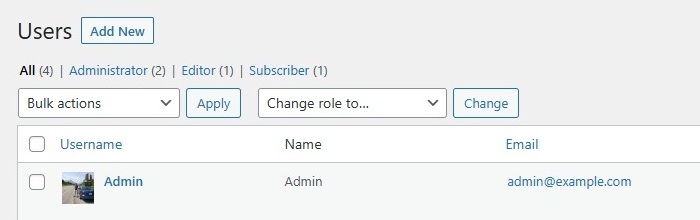
Above the table are links to All (users) and to users belonging to each of the various roles. Clicking on one of those links, say Subscribers, will display all the users assigned the Subscriber role.
Using selection, actions, and applyLink to this section
SelectionLink to this section
This screen allows Bulk Actions to be performed on one or more users selected in the table. For Bulk Actions to be performed on multiple users at once, those users must be first selected using the checkbox to the left of the user.
ActionsLink to this section
Actions describe the process to be performed on particular users. There are two styles of actions that will be referred to as Bulk Actions and Immediate Actions.
- Bulk Actions
These actions can be performed on one, or more users, at one time, if those users have been previously selected. Bulk Actions are available as choices in the Bulk Actions select box, above the table. - Immediate Actions
Immediate Actions (also known as Quick Edits) are performed immediately, on an individual user. Hovering the mouse cursor over the user row reveals the actions under the username column. Clicking on a username will also initiate the Edit action.
The available Bulk Actions are:
- Delete – This action deletes the user(s).
- Send password reset – This action lets you send a password reset link by mail to the selected user(s). So they are able to reset their password by themselves.
And the available Immediate Actions are:
- Edit – This action displays the Edit user screen.
- Delete – This action deletes the user.
- View – This action lets you view the user (author) page on the public facing site. The page will display posts belonging to the user.
- Send password reset – This action lets you send a password reset link by mail to the selected user(s). So they are able to reset their password by themselves.
ApplyLink to this section
After one or more users are selected, and after a Bulk Action is specified, the Apply button performs the given action on the selected users. Remember, prior to executing actions, one or more users must be selected, as described before.
Change role toLink to this section
To the right of the Bulk actions is the Change role to select box. Select a role, and all the users that have been selected (checked), will be changed to that role upon clicking the Change button. At successful completion a “Changed roles” notification displays.
Deleting UsersLink to this section
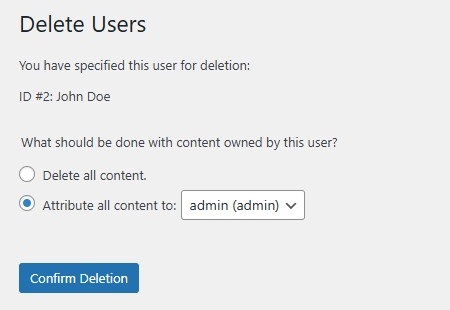
When deleting a user with attached content, such as posts and pages, you will get the following notificaction. ClassicPress lets you attribute all of their content to another user. Not doing so, will permanently remove all of their content.
Adding and Editing Individual UsersLink to this section
For adding users navigate to the Users Profile Screen. The user editing mode is essentially the same, the only difference is that the button to save your work is called Update User instead of Add New User.