
- What is a child theme?
- How do I make a child theme?
- Step 1 – Create a new folder
- Step 2 – Create CSS-file and add headers
- Step 3 – Create PHP-file and enqueue parent theme CSS
- Step 4 – Install child theme
- Step 5 – Activate child theme
- How do I start making changes?
- Create a child theme with plugin
- Need help?
- Credits

When performing changes to your theme, like styling, functionality, or a template, it is often advised to use a child theme. But how do you make a child theme? What even is a child theme? Why do you need this? All questions that people new to this level of ClassicPress will come up against. This tutorial will do its best to answer these questions in the easiest way possible.
What is a child theme?Link to this section
Simply said, a child theme is a theme that is dependent on another theme. The theme that the child theme is dependent on is called the parent theme. The child theme will pull its code from the parent theme to fill in any gaps. This will make it appear as if you’re using the parent theme.
So why use a child theme?Link to this section
In the child theme you can overwrite styling, functionality and templates from the parent theme without actually changing the parent theme. This means that when you update the parent theme, these changes will remain in effect. So, you can safely make all the changes to a theme that you want, without having updates overwrite your efforts.
Note: If you only want to make some minor changes to the styling of your theme, consider using the ‘Additional CSS’ page of the Customizer instead. Less work, same result.
What do I need?Link to this section
Depending on your situation you need:
- Access to your ClassicPress files.
- A parent theme of your choosing. For this tutorial we will use Twenty Seventeen.
- A code/text editor like Notepad++.
- An FTP application like FileZilla.
How do I make a child theme?Link to this section
By now you should be convinced that, if you are going to make changes to a theme, you should generally use a child theme. So let’s make one step by step.
There are multiple ways to create a child theme.
- You can use the file manager in your hosting panel (depending on your host), to create your child theme online.
- Or run and develop ClassicPress locally on your own device and use a code/text editor to create and edit files.
Step 1 – Create a new folderLink to this section
Open your ClassicPress installation and navigate to the wp-content > themes folder.
Create a new folder and access it. The name does not really matter, but for future reference, it is easiest to name this folder -child. So in this case it will be twentyseventeen-child.
Step 2 – Create CSS-file and add headersLink to this section
Create a file named style.css in the new folder and open it in your editor.
Next we are going to create some theme headers. Like below:
- Theme Name => Your unique child theme name.
- Description => A short description of the child theme.
- Version => Version of the child theme.
- Author => Your name.
- Author URI => Your site or your ClassicPress Directory or GitHub profile page.
- Template => The folder name of your parent theme, in this case twentyseventeen.
- Text Domain => The folder name of your child theme, in this case twentyseventeen-child.
Note: Only Theme Name and Template are required, the rest is optional.
Now add these headers to the style.css you created like below and save the file.
/*
Theme Name:  Twenty Seventeen Child
Description: Example of a Child theme for Twenty Seventeen
Version:     1.0.0
Author:      John Doe
Author URI:  https://directory.classicpress.net/developer/john-doe/
Template:    twentyseventeen
Text Domain: twentyseventeen-child
*/

/* You can add custom CSS below */
Step 3 – Create PHP-file and enqueue parent theme CSSLink to this section
Create a file named functions.php in the new folder and open it in your editor.
Add the following code to the functions.php file and save it. This will include the styling of the parent theme.
<?php
// Enqueue parent theme css
add_action( 'wp_enqueue_scripts', 'enqueue_parent_theme_css' );
function enqueue_parent_theme_css() {
	wp_enqueue_style( 'parent-style', get_template_directory_uri().'/style.css' );
}

// Add custom functions below
Step 4 – Install child themeLink to this section
You can skip this step if you’ve created your child theme online via the file manager in your hosting panel.
If you created your child theme locally, create a ZIP file of your child theme and install it via the ClassicPress admin area > Appearance > Themes > Add New. Or upload the child theme with an FTP application to the wp-content > themes folder on your server.
If you for some reason forgot to install the parent theme first, you will be prompted to do so.
Step 5 – Activate child themeLink to this section
Go to your ClassicPress admin area > Appearance > Themes, where you can activate the child theme.
Once activated your child theme is ready for use!
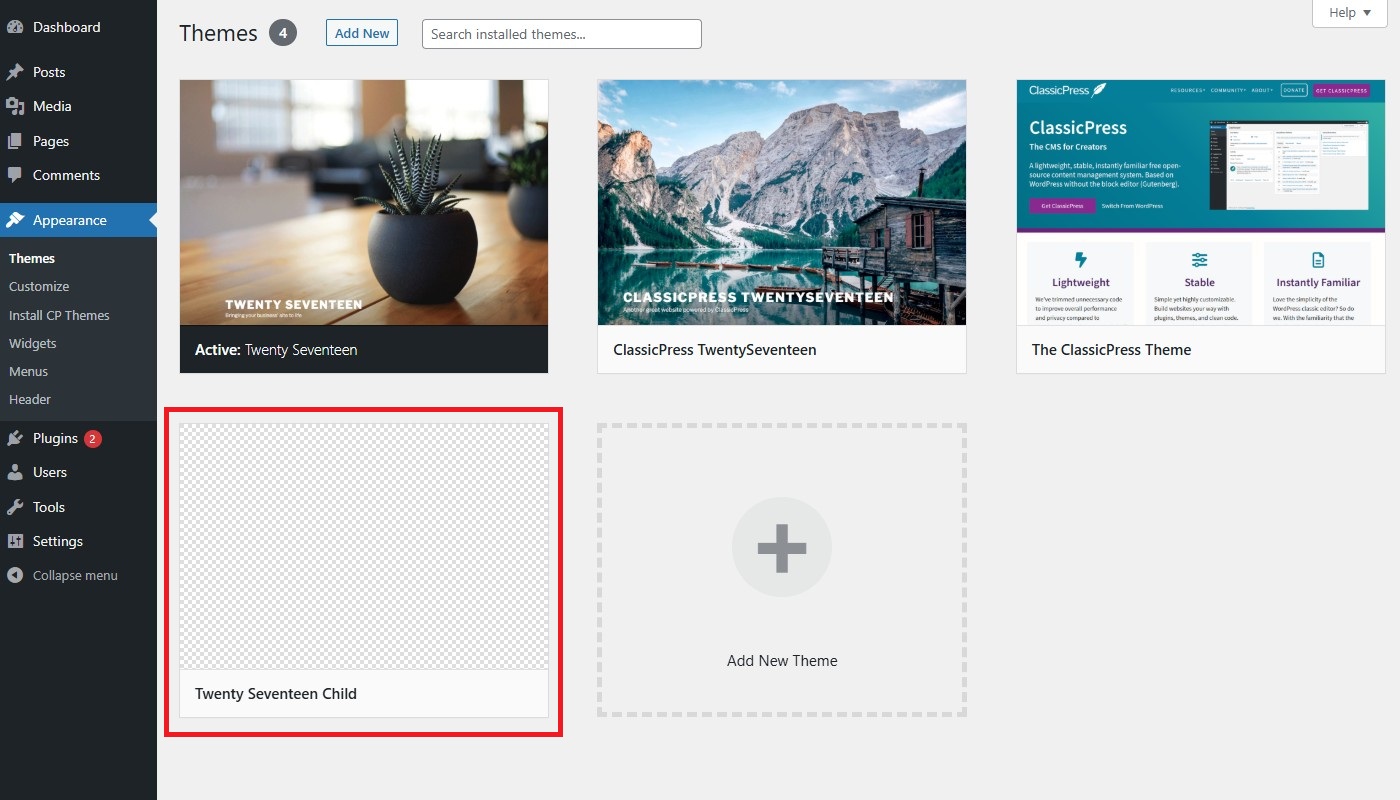
As you can see above, the child theme doesn’t have its own screenshot yet. But you can easily add one. The size of the screenshot should be 1200 × 900 px, named screenshot.png, and included in the main child theme folder.
How do I start making changes?Link to this section
Now that your child theme is ready for use, you obviously want to start making changes. As mentioned before, there are three main uses for your child theme:
- Change styling (CSS)
- Add functionality
- Edit templates
Changing stylesLink to this section
To overwrite your theme’s CSS, simply go to the style.css file you made during the creation of this child theme. Add the CSS changes you want below /* You can add custom CSS below */ and save them.
Note: The child theme styles are rendered after the parent, so anything you add here will overwrite the specifications made in the parent’s style.css file.
Adding functionalityLink to this section
Often when you are trying to add functionality through snippets, you will be instructed to add them to your theme’s functions.php. It works the same way with a child theme. You can add these snippets or write your own in the functions.php file you made during the creation of this child theme. Just add them below // Add custom functions below and save them.
Editing templatesLink to this section
To edit a template file you must first find the file in your parent theme. For example single.php, sidebar.php, footer.php, etc. When you have found the file you want to edit, make a copy and upload this copy to your child theme. Be careful to keep the URL structure intact! For example, if you found a file in the folder template-parts, make sure it is also placed in a folder named template-parts in your child theme.
Some plugins let you edit their templates in your child theme. To do this, go to your plugin folder and look in the templates folder. Copy the file you want to edit. When in your child theme, make a folder with the same name as the plugin’s folder and add the copy of the file you wish to edit to this folder. Note that if the plugin file is located in a sub folder (e.g. plugin-name/templates/header/site-branding.php), you should create a matching sub folder in the newly added templates folder of your child theme (e.g. child-theme-name/plugin-name/header/site-branding.php). Now you can safely make the changes you want. This newly added templates folder will override the template(s) from the plugin.
Create a child theme with pluginLink to this section
There are also (WordPress) plugins around that let you create your child theme from within the ClassicPress admin area. Because none of them officially support ClassicPress, we cannot guarantee they also work properly in ClassicPress.
Need help?Link to this section
You could always ask for support at the Themes forum page or in the Themes Zulip channel.
CreditsLink to this section
This document is based on a tutorial written by Patrick Klein and posted on the ClassicPress blog.