
ClassicPress allows you to store a set of external links, also known as your blogroll. These links can be put into categories and displayed on your site, usually using widgets.
You can activate the Link Manager by clicking the “Link Manager enabled” box at the Settings > General screen.
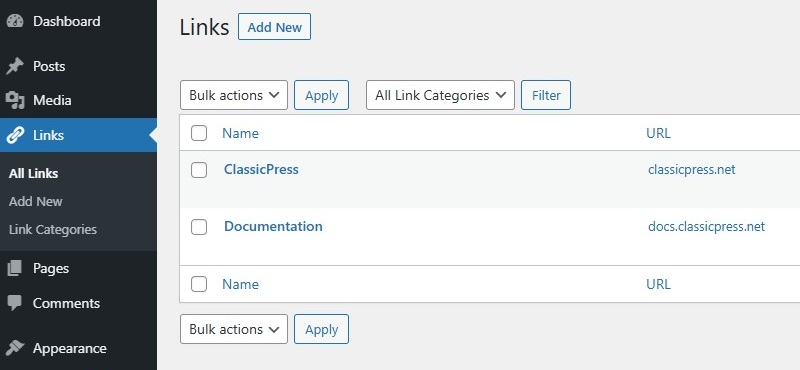
Links ScreenLink to this section
Table of LinksLink to this section
When you click on “Links” in the navigation menu on the left of your administration screen, you will come first to the overview page, where you will see a list of all of your links.
Each link is a row in the table and the table has the following columns:
- Name – The name of the link.
- URL – The URL (location) of the link.
- Categories – The categories that the link is in.
- Relationship – The XFN relationship for this link.
XFN stands for XHTML Friends Network and is a simple way to represent human relationships using hyperlinks. More about this below. - Visible – Whether or not the link is visible to visitors on your site.
- Rating – A ranking of the link, which can be used to sort links within categories.
Sortable ColumnsLink to this section
Some column headings can be clicked to sort the table of links in ascending or descending order. Hover over the column title, for example Name, to see the up-arrow or down-arrow. Click the heading to change the sort order.
Screen OptionsLink to this section
The Screen Options allow you to choose which columns are displayed, or not displayed, in the underlying table. Clicking on the Screen Options tab shows a list of the columns with a check-box next to each column. Check the box for each column you want displayed in the table, or uncheck the box to not display that column.
SearchLink to this section
Above the table, to the right, is a search box where you can enter a word, or series of words, and click the Search Links button to search and display all the links meeting your search words.
Filtering OptionsLink to this section
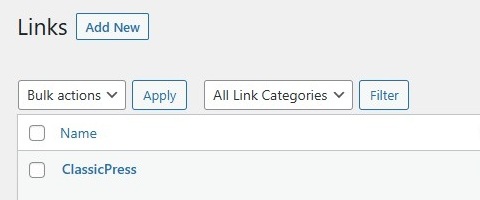
Above the table, with the select box, you can filter the links by category (if available). By default, All Link Categories is selected.
Using Selection, Actions, and ApplyLink to this section
SelectionLink to this section
This screen allows Bulk Actions to be performed on one or more links selected in the table. For Bulk Actions to be performed on multiple links once, those links must be first selected using the checkbox to the left of the link.
ActionsLink to this section
Actions describe the process to be performed on particular links. There are two styles of actions that will be referred to as Bulk Actions and Immediate Actions.
- Bulk Actions
These actions can be performed on one, or more link, at one time, if those links have been previously selected. Bulk Actions are available as choices in the Bulk Actions select box, above the table. - Immediate Actions
Immediate Actions (also known as Quick Edits) are performed immediately, on an individual link. Hovering the mouse cursor over the link row reveals the actions under the link name column. Clicking on a link name will also initiate the Edit action.
The available Bulk Actions are:
- Delete – This action deletes the link(s).
And the available Immediate Actions are:
- Edit – This action displays the Edit link screen.
- Delete – This action deletes the link.
ApplyLink to this section
After one or more links are selected, and after a Bulk Action is specified, the Apply button performs the given action on the selected links. Remember, prior to executing actions, one or more links must be selected, as described before.
Adding LinksLink to this section
When you click Links in the administration menu, and then click Add Link, you will come to the Add Link screen, where you can add a new link to your list.
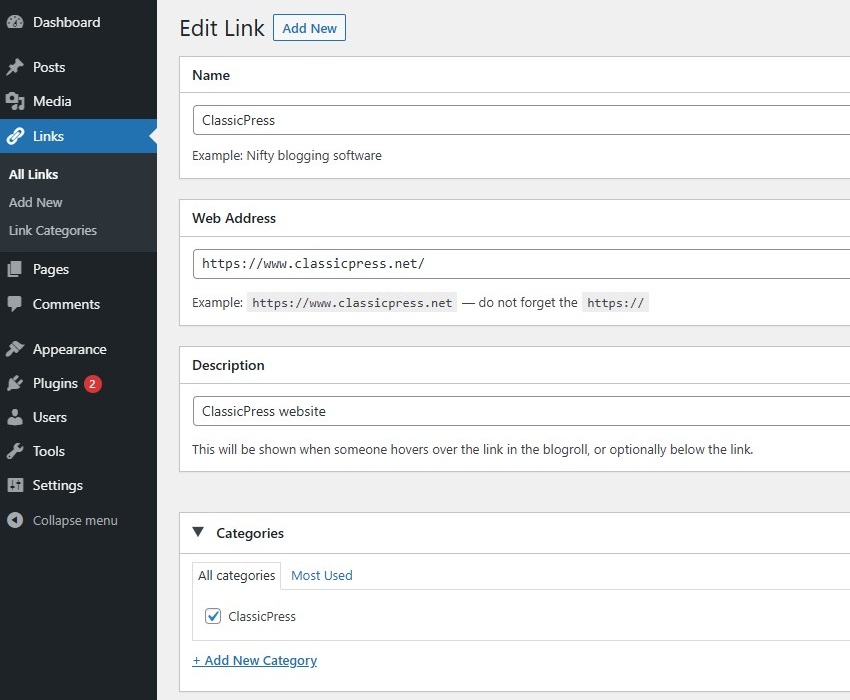
The screen has the following fields:
- Name – The text that will be shown on your blog screen for the link (e.g. John Doe’s Blog).
- Web Address – The URI of the web page you’re linking to (e.g. https://www.example.com).
- Description – This descriptive text will be put on the screen after the actual link. It will also be shown to the user as a “tool-tip” when they hover their mouse over the link. (e.g. The blog of John Doe, unknown blogger).
- Categories – Select the category for the link. Links can be put into multiple categories.
- Target – Specifies the target attribute that will be put onto the link’s a tag. There are three options:
- none: open the link in the same window or frame (default).
- _top: if you’re using frames, open the link at the top level of the frame system.
- _blank: open the link in a new window.
- Link Relationship (XFN) – XFN (Xml Friends Network) is a way to define your relationship with the linked person. For example, if you work with Jane Doe, and you link to her blog, you can check “co-worker” or “colleague”, which means that she is one of those.
XFN relationships are optional for ClassicPress links. You can leave everything in this section blank and all your links will still work. Defining Relationships with XFN makes the links defined on your blog more understandable to machines that will process your pages. - Advanced – The Advanced fields can add extra information to the link.
- Image Address – An image to be displayed with the link. This can either be an absolute URI (e.g. https://www.example.com/images/image.png) or a relative path (e.g. /images/image.png). You may want this to be rather small (e.g. 16 x 16px), similar to an icon.
- RSS Address – URI of the RSS feed associated with the link, which will be displayed next to the link itself (e.g. https://www.example.com/feed).
- Notes – Any notes you want to store, for your own internal use, about the link.
- Rating – A ranking of the link, which can be used to sort links within categories.
When you have set all the options, click Add Link to add the new Link to your blogroll. You can hide a link (temporarily or permanently) by choosing “Keep this link private”.
Link CategoriesLink to this section
Links in ClassicPress can be organized into categories, all the better for organization. You are given the ability to add, edit and delete categories.
To display links at the public facing site, there must always be at least one (default) link category. If you want to delete the default category, first set another link category as the default in the Settings > Writing Screen.
As the posts categories screen is a similar screen, see the Posts Categories Screen document for a detailed description on how to add, edit and delete link categories.
Display LinksLink to this section
There are various ways to display your blogroll on the public facing site. How it looks varies from theme to theme.
Links widget
With the default Links widget you could display your blogroll in your sidebar, or in any other widget area. There are various settings to customize the display of your blogroll.
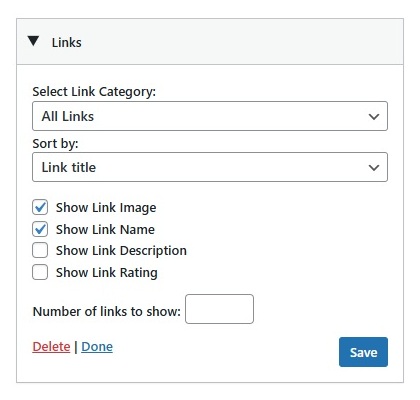
- Select Link Category – Select the category of wich links should be displayed. By default links of all categories are displayed.
- Sort by – Select the sorting order of the link of each category. By default links are displayed by title.
- Show Link Image – Check this box if you want to display the link image (icon).
- Show Link Name – Check this box if you want to display the link name.
- Show Link Description – Check this box if you want to display the link description.
- Show Link Rating – Check this box if you want to display the link rating.
- Number of links to show – Enter the number of links to show. By default all links of a category are displayed.
Plugins
There are also (WordPress) plugins around that let you display your blogroll in the main content area of your site. Often in seperate category based columns. Currently only this plugin officially supports ClassicPress. Because other ones do not officially support ClassicPress, we cannot guarantee they also work properly in ClassicPress.